What to Put Behind a Couch: 8 Listing-Ready Ideas

A well-proportioned sofa sits against an empty wall, but the listing photo still feels unfinished. The gap behind the couch pulls attention away from the seating area, makes the room look less intentional, and can leave buyers wondering how the space should function.
The right answer to what to put behind a couch depends on the wall's width, ceiling height, natural light, walking clearance, property style, and how quickly you need to prepare the home. A temporary console, artwork, or plant arrangement may be appropriate for a scheduled shoot, while paint, wallpaper, paneling, or built-ins belong in a renovation conversation. You also need to decide whether the sofa should stay against the wall at all. In a compact room, leaving the area empty can protect circulation and make the room appear larger.
The eight ideas below treat the sofa-back zone as a listing-photo decision. Each one addresses placement, scale, lighting, buyer focus, and the trade-off between visual impact and practical staging.
1. Large-Scale Artwork or Mirror Installation
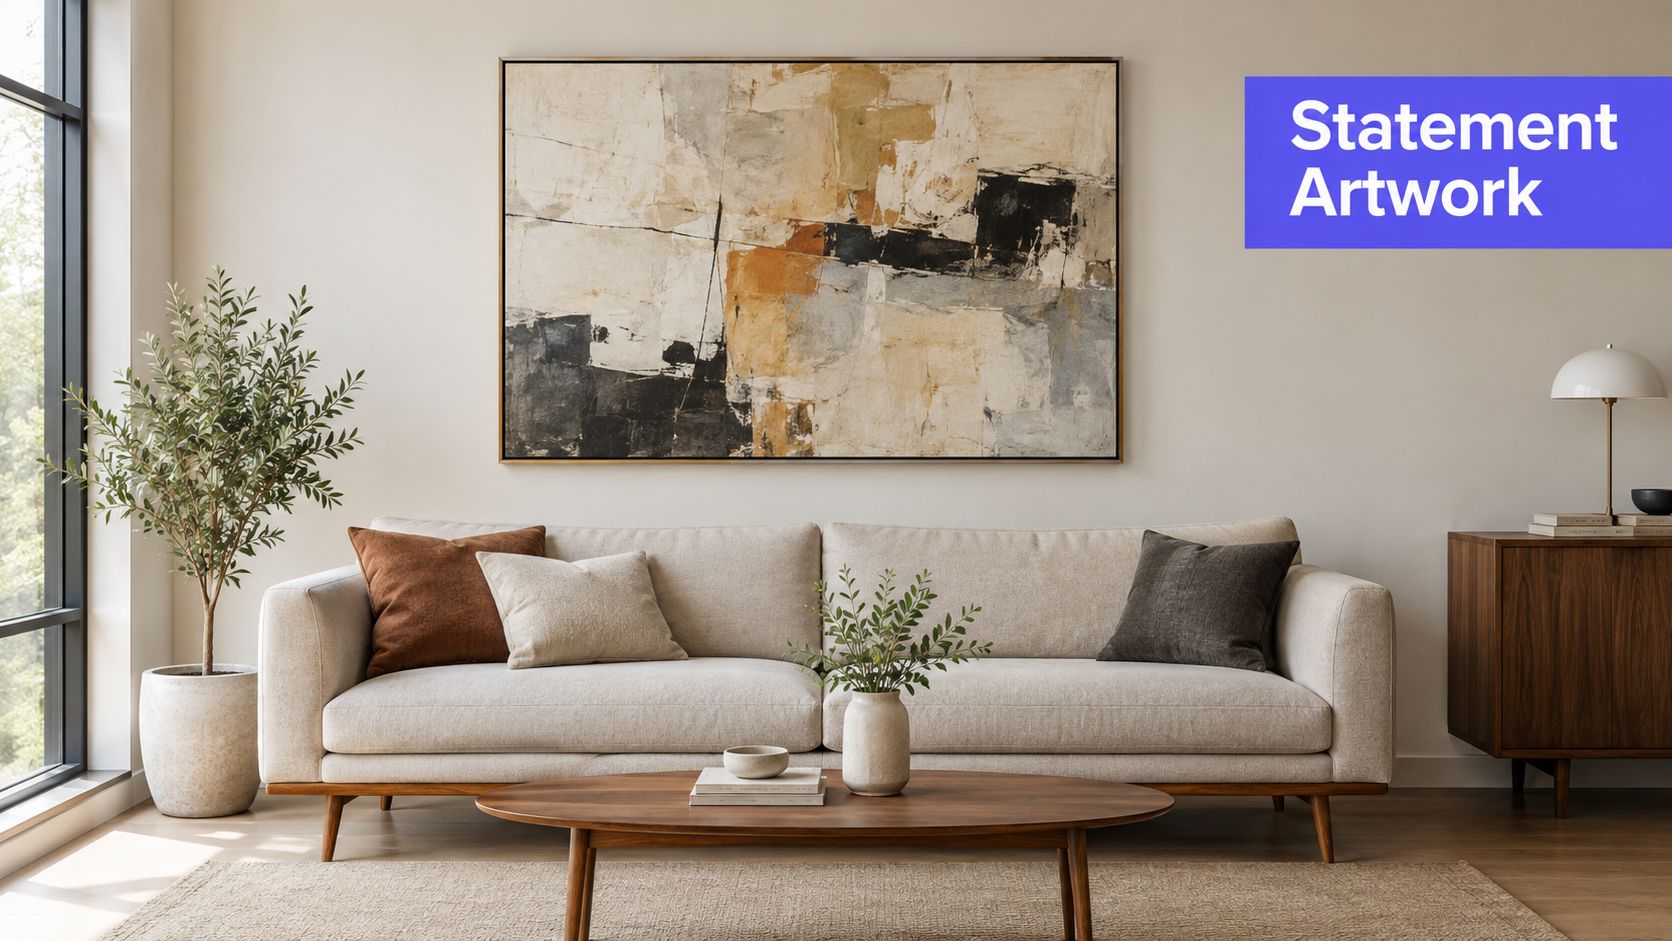
Large artwork or a substantial mirror gives the camera an immediate focal point without taking floor space. A blank wall can make a furnished living room look temporary, while one carefully scaled installation can make the seating zone appear designed rather than merely occupied. Abstract art works well in contemporary homes, coordinated gallery arrangements suit transitional interiors, and a broad black-framed mirror can reinforce the clean lines of a modern farmhouse listing.
Scale matters more than the subject. Keep artwork at roughly 50% to 75% of the couch width so it relates to the sofa without overwhelming it. For a group of smaller pieces, treat the arrangement as one visual unit and measure the complete composition, not each frame separately. A mirror should reflect a positive feature, such as a window, attractive lighting, or open space. If it reflects the photographer, clutter, or an awkward hallway, it can weaken the image rather than enlarge it visually.
Photography rule: Review the reflection from the camera position before the shoot. A beautiful mirror in person can become a distracting glare or a reflection of equipment in the final frame.
Match the installation to the property
A modern farmhouse home may benefit from two large black-framed mirrors above a neutral sofa. A contemporary property can carry an abstract painting with a restrained color palette, while a luxury listing may support a taller art installation that draws the eye upward. Avoid generic artwork that introduces colors unrelated to the room. Buyers should notice the room's proportions first, not a random decorative object.
For a vacant property, physical art can add depth without filling the floor plan. For a lived-in home, remove personal photographs and visually busy collections before adding the focal piece. Agents who need to test the composition quickly can use Stage AI's virtual staging tools to preview artwork or a mirror before arranging physical inventory.
2. Accent Wall Treatment with Complementary Paint or Wallpaper
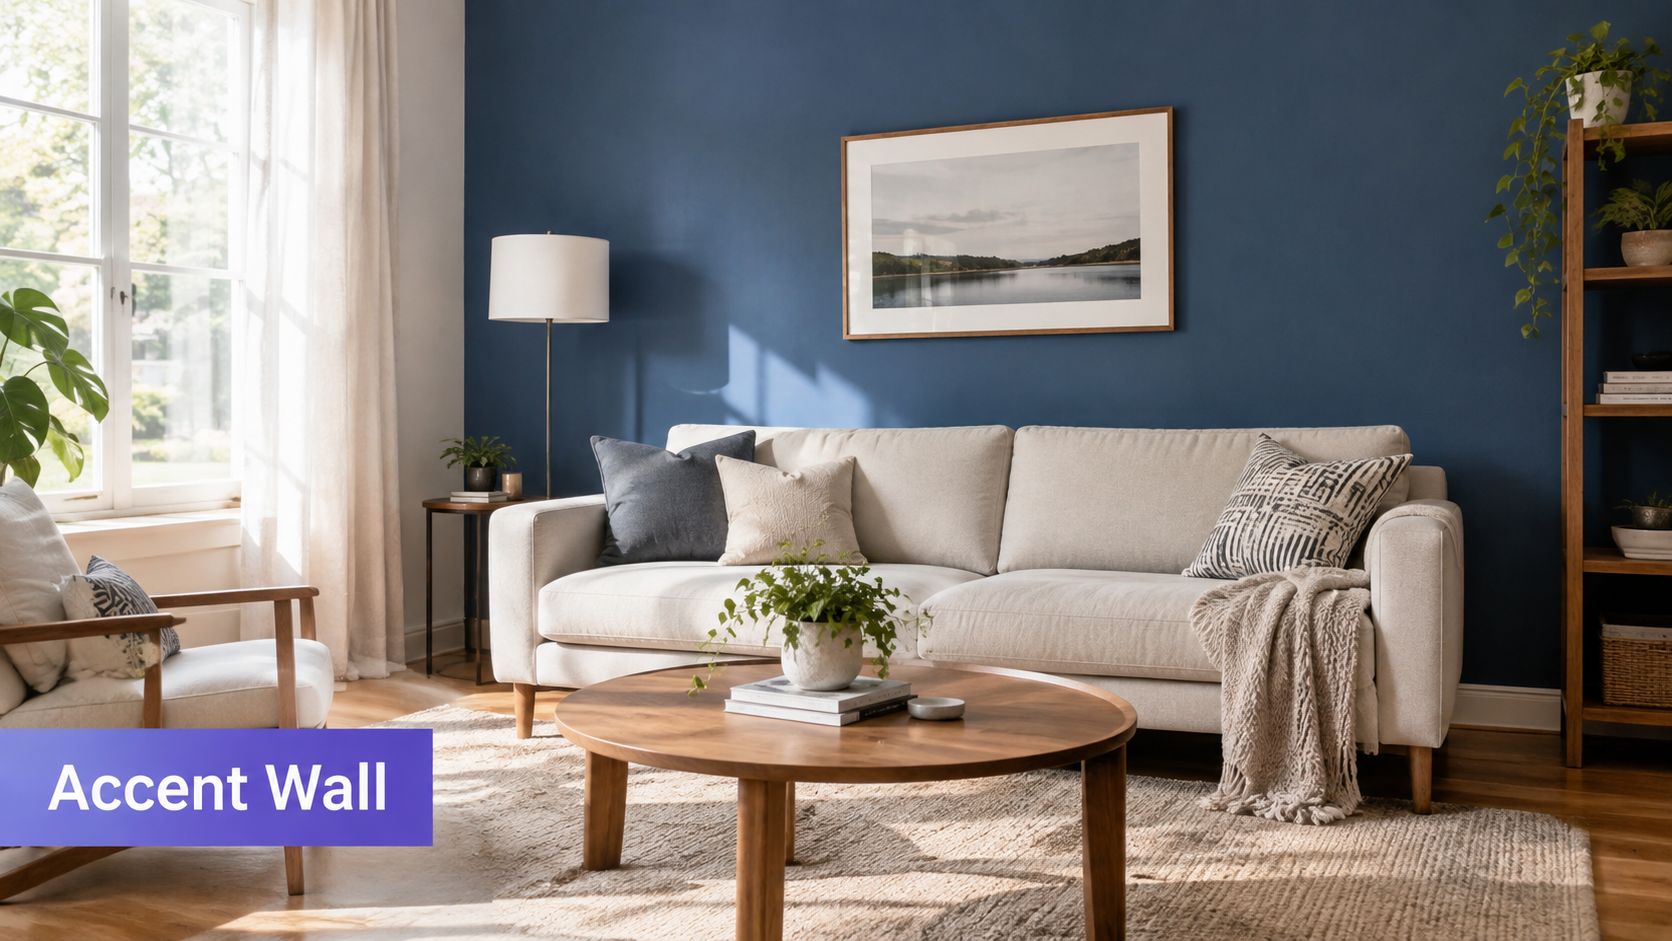
An accent wall can turn the space behind the sofa into a clear visual boundary. That boundary helps the living room read quickly in an MLS image, especially when the sofa floats in an open-plan layout and the camera needs to show where one zone ends and another begins. Soft white or muted green shiplap can support a farmhouse property, while geometric wallpaper or a deep jewel tone may suit a contemporary home.
The strongest accent walls coordinate with something already present. Pull a color from the rug, fireplace, cabinetry, or upholstery instead of introducing an unrelated statement shade. A warm neutral textured wall can add depth without competing with furniture, while a bold pattern needs a quieter sofa and restrained accessories around it.
Paint and wallpaper are more permanent than artwork or a console, so agents should separate a listing-preparation recommendation from a seller renovation recommendation. If the home is already being refreshed, a wall treatment may make sense. If photography is scheduled soon, removable wallpaper, a carefully placed backdrop, or virtual staging may create the desired composition without delaying the listing.
Test the wall from the camera's point of view
Photograph paint samples at different times of day. A color that looks balanced in natural light may become too dark under interior lighting or photograph with unwanted glare if the finish is too reflective. Keep the wall visually calm when the sofa, rug, and windows already provide strong contrast.
For more planning ideas, this guide to accent wall design can help agents test a direction before recommending a permanent change. The final wall should still reflect the property's actual condition and match what buyers will encounter during a showing.
3. Layered Window Treatments and Natural Light Enhancement
If a window sits behind or beside the couch, the window treatment may be the most valuable thing to add. Bare glass can make a room feel unfinished, while full-height curtains frame the light source and give the photograph a stronger vertical structure. Neutral linen drapes suit a luxury or transitional listing, white sheers can support a farmhouse interior, and simple roller shades often fit a modern home better than decorative hardware.
Mount curtains high, close to the ceiling, when the architecture allows it. This draws the eye upward and helps the wall read as taller in the image. Let panels fall cleanly and keep the sofa from hiding too much of the window. If the couch sits directly in front of the glass, use the treatment to frame the composition rather than creating a heavy block behind the furniture.
Layering provides control. Sheer panels soften daylight and preserve brightness, while opaque curtains add depth and allow privacy during showings. The combination also gives the photographer options when sunlight changes. Coordinate the shoot with the room's best natural-light period, then use lamps or other interior sources to keep the sofa from becoming a dark silhouette.
Choose light control over decoration
A window treatment that photographs beautifully but blocks the room's strongest light may hurt the listing image. Open sheers, pulled-back drapes, and clean hardware usually work better than complicated valances or heavily patterned fabric. Check the view outside as well. If the window looks onto an unattractive area, framing it selectively can direct attention toward the interior without making the room feel closed in.
Agents preparing a darker living room can also consult this practical guide to brightening dark rooms. The best result balances brightness, privacy, and architectural polish rather than adding fabric to fill a wall.
4. Floating Shelving or Built-In Shelving Display
Shelving behind a couch can communicate storage, personality, and function in one frame. Floating shelves suit modern lofts and smaller rooms because they provide display space without the visual weight of a full cabinet. Built-ins make a stronger architectural statement and can help define an open-plan living area, but they require more commitment and should align with the home's existing construction and style.
Style the shelves as a composition, not a storage dump. Use books, a plant, a sculptural object, and a small framed piece, then leave visible wall space around them. A consistent palette keeps the display from becoming a collection of competing colors. Baskets can suggest practical storage in a farmhouse property, while art books and restrained ceramics may better support a contemporary listing.
A shelf should show buyers how the room can function, not prove how much decoration it can hold.
Keep the camera's depth of field in mind
Overfilled shelves create small, high-contrast shapes that become visual noise in listing photos. Remove duplicate objects, hide cables, and avoid fragile pieces that could shift between the staging appointment and the shoot. If a shelf sits above the sofa, secure it properly and check that its position doesn't interfere with the seating area or create a safety concern.
A modern loft might use two floating shelves with coordinated books and sculptural accessories. A period home may benefit from built-in shelving painted to match existing trim. Before specifying dimensions, compare the shelf position with the sofa back, ceiling line, and nearby doors. This bookshelf height guide can help with planning, but the final decision should follow the room's furniture and circulation.
A short visual reference can also help sellers understand how shelving changes the wall's balance.
5. Decorative Plants and Living Wall Elements
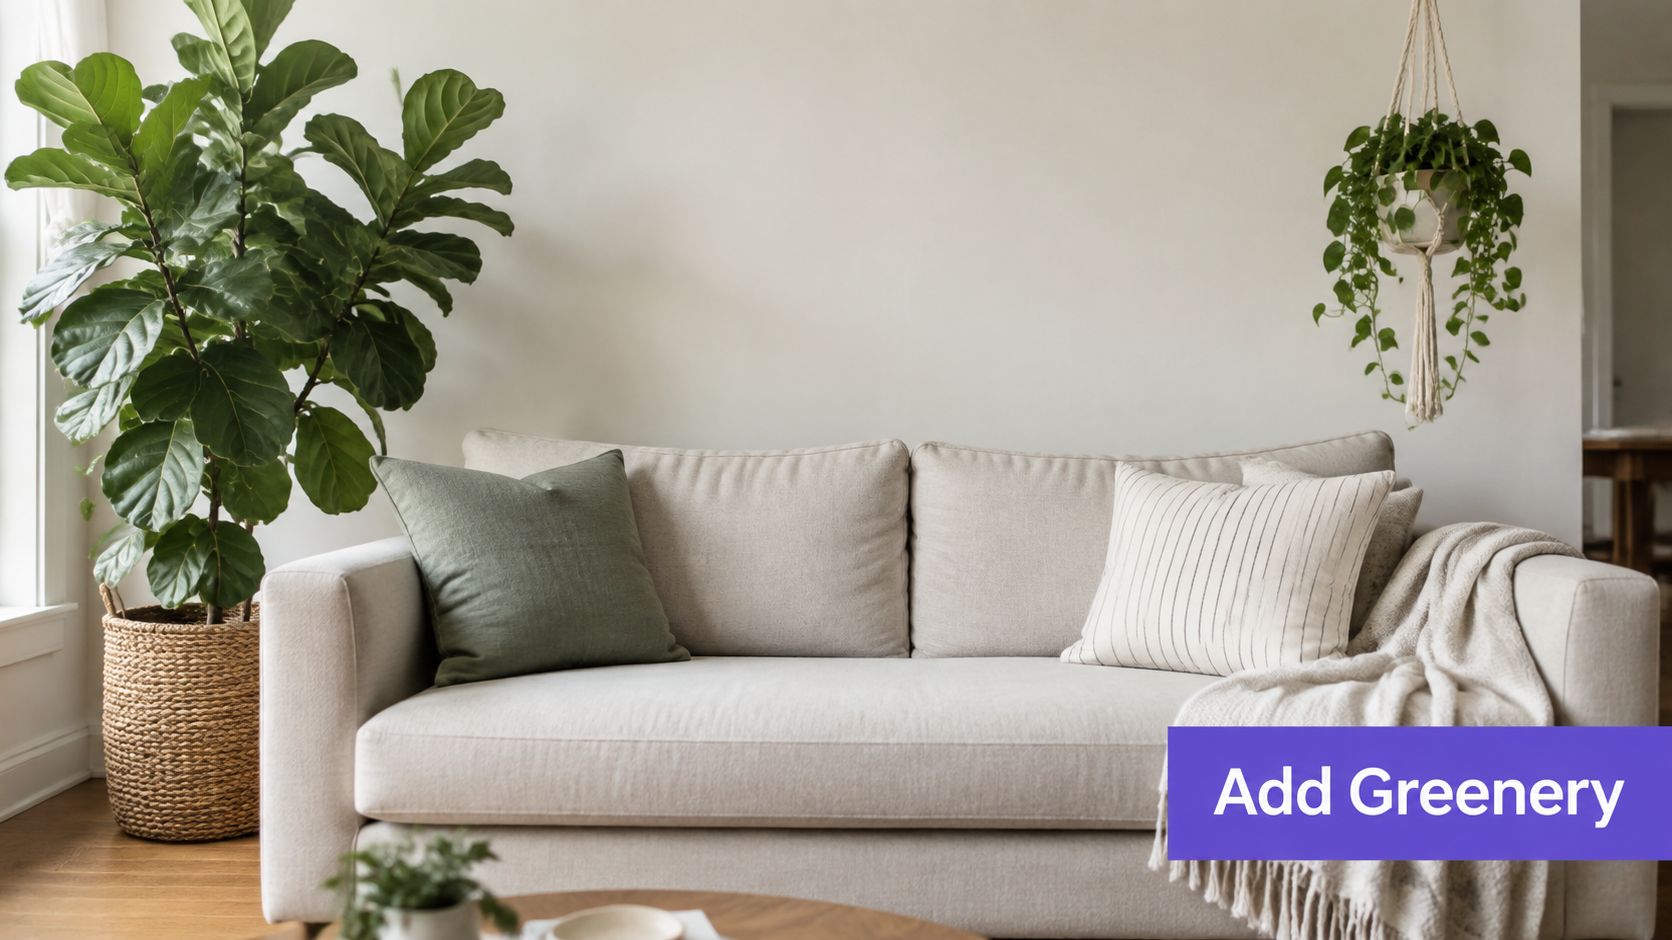
Plants soften the hard edge of a sofa and introduce height, color, and organic shape into a listing photo. A large fiddle-leaf fig, monstera, bird of paradise, or snake plant can frame the seating area without requiring a permanent wall alteration. The strongest placement usually sits beside the couch, near a window, or in an architectural corner, rather than directly blocking the sofa's center.
Greenery works especially well when the room's finishes feel flat. A neutral couch, wood floor, and pale wall can look more inviting with one tall plant and a simple planter. In a bohemian or farmhouse property, several smaller plants may support the style, but the arrangement still needs a clear hierarchy. Luxury contemporary listings often benefit from one sculptural plant or a restrained living-wall element rather than a crowded collection.
Stage healthy greenery, not filler
Dead leaves, dusty pots, and inconsistent containers show up quickly in professional photography. Clean the leaves, water plants before the shoot when appropriate, and replace stressed specimens with healthy alternatives. Matching or coordinating planters make the arrangement look deliberate. Avoid placing plants where they block windows, hide architectural features, or narrow the path around the sofa.
Lighting changes the effect. A plant beside a lamp can create layered depth, while a plant in front of a bright window may become a dark silhouette. Take a test frame from the intended camera position and move the pot until the foliage supports the sofa instead of competing with it.
6. Textured Throws, Pillows, and Layered Soft Furnishings
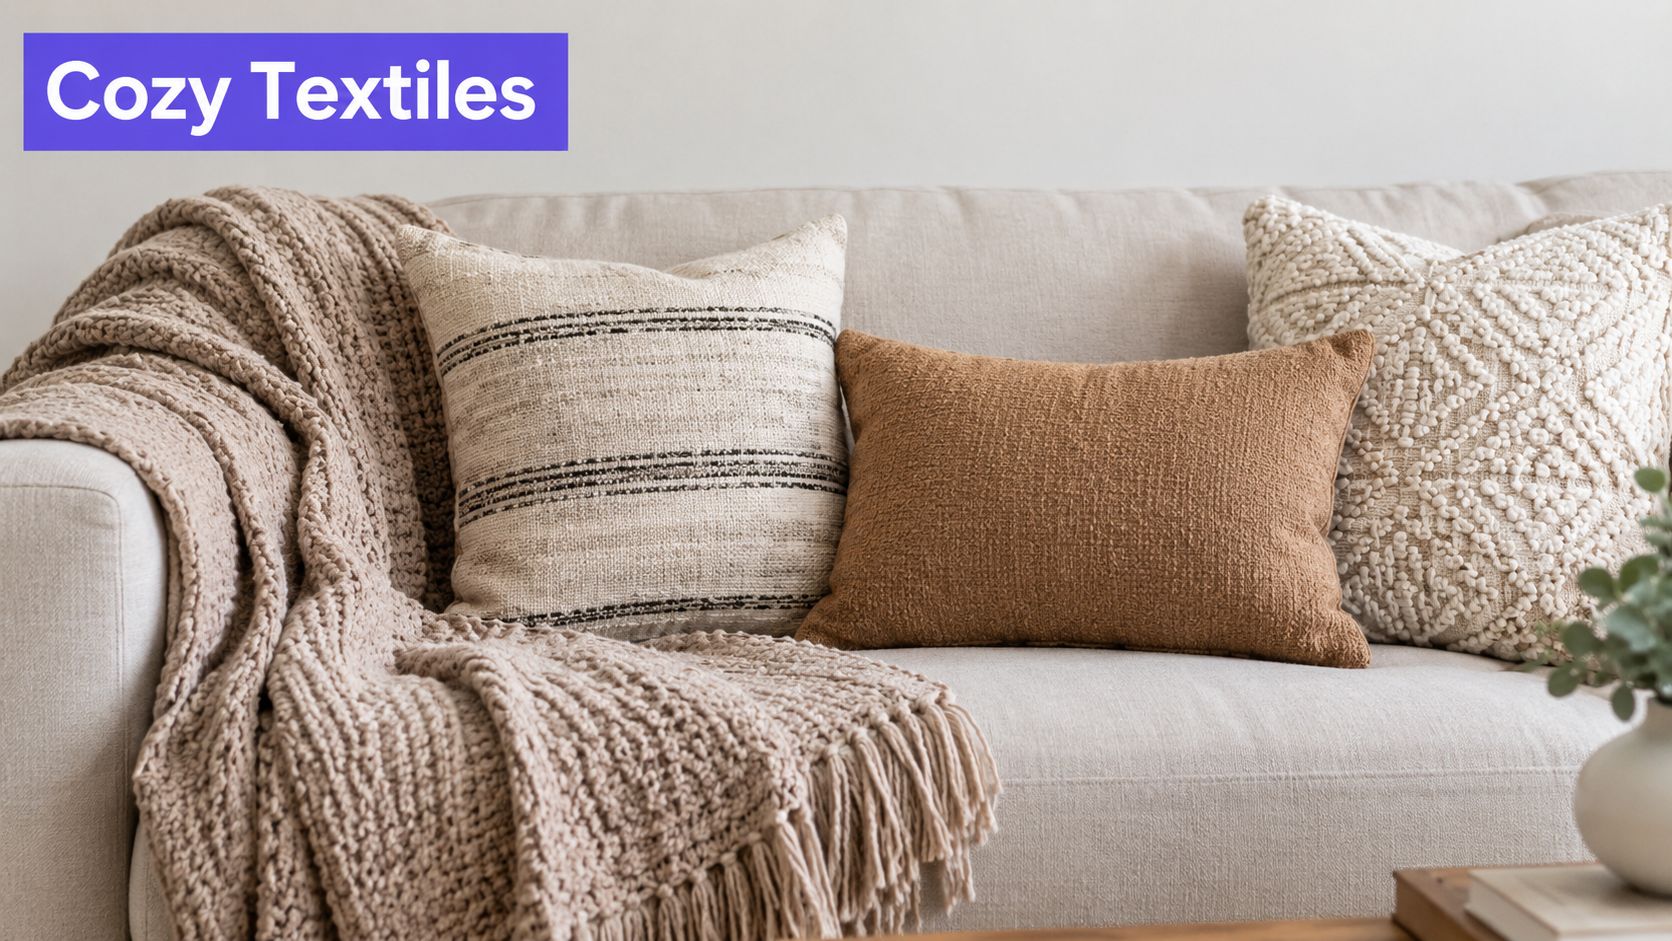
Soft furnishings can change the perceived quality of a sofa without changing the wall behind it. A folded throw over one arm, three to five coordinated pillows, and a restrained color palette create the comfort cue buyers expect from a living room image. This is one of the fastest reversible staging options, making it useful when the property needs polish without installation, painting, or delivery of large furniture.
Use different textures and sizes, but keep the arrangement controlled. Combine a solid pillow, a subtle pattern, and a tactile fabric such as boucle or linen. A single patterned throw can add movement to a contemporary room, while warm woven fabrics may suit a farmhouse property. Limit the dominant palette so the sofa still reads as the main form.
The couch itself remains the subject. Pillows should follow the sofa's structure rather than forming an artificial mound across the entire seat. Drape the throw naturally, then remove anything that hides the upholstery, blocks a walkway, or makes the room look staged beyond everyday use.
Style for the frame, not just the room
Photographers often capture the sofa from an angle, so check both the front and side views. A pillow that looks balanced head-on may appear crowded from the corner of the room. Keep tags, wrinkles, and personal blankets out of the image, and use a quick steam or reshape before the camera arrives.
Soft furnishings can also support an otherwise quiet wall. If the sofa sits against a blank surface and the property doesn't justify artwork or shelving, textiles can add enough visual layering to make the room feel complete without introducing another large object. They won't solve a poorly scaled sofa or blocked circulation, but they can sharpen the final presentation quickly.
7. Architectural Backdrop Staging with Paneling or Decorative Wall Finishes
Shiplap, board-and-batten, wood paneling, exposed brick, and other decorative finishes can give the wall behind a couch a memorable identity. In a listing image, texture creates depth and helps a plain room stand apart from similarly furnished properties. It can also clarify the home's architectural language. White shiplap supports a cottage or farmhouse setting, exposed brick suits a loft, and painted board-and-batten can reinforce a transitional interior.
Permanent wall treatments deserve careful judgment. A seller may welcome a renovation recommendation if the room lacks character and the finish fits the property, but an agent preparing for an imminent listing usually needs a reversible solution. Temporary panels, removable treatments, or virtual staging can help test the visual direction before anyone commits to materials and labor.
Respect scale and existing architecture
Paneling that is too busy behind a large sofa can make the room feel compressed. Keep lines aligned with the wall, trim, windows, and door casings, and choose a finish that complements rather than imitates unrelated features elsewhere in the home. A polished installation should look integrated. Uneven seams, poorly finished edges, or mismatched paint can signal unfinished work in close listing photos.
Lighting is part of the treatment. Side light can reveal texture, while direct glare can flatten it or produce distracting highlights. Test the wall from the intended camera angle before suggesting a full installation. If the finish adds strong character, keep the sofa, pillows, and artwork quieter so buyers focus on the room's proportions and construction rather than a crowded collection of statements.
8. Statement Lighting Fixtures and Ambient Lighting Design
Lighting above or beside a couch can provide the vertical punctuation an empty wall lacks. A sculptural pendant suits a modern home, a vintage-style fixture can support a farmhouse listing, and minimalist sconces may work better in a contemporary luxury property with clean architectural lines. The fixture should guide attention toward the seating zone while improving the room's actual light balance.
Scale is critical. A small pendant disappears in a large living room, while an oversized fixture can dominate the sofa and make the ceiling feel lower. Position a fixture with enough clearance above the couch and coordinate its finish with visible hardware, cabinet pulls, and other lighting. For a sofa-back installation, a commonly used placement range is 30 to 36 inches above the couch back, but the ceiling height, fixture size, and walking path should determine the final position.
Build a layered lighting scene
One overhead fixture rarely solves every photography problem. Combine it with a table lamp on a console, a floor lamp beside the sofa, or recessed lighting already present in the room. Use dimmable bulbs so the photographer can balance warm ambient light with daylight rather than forcing one harsh setting.
Avoid fixtures that reflect directly into the camera or cast strong shadows across artwork and upholstery. Turn on only the sources that improve the frame. A glowing pendant may look attractive in person but distract from a bright window or produce a hot spot in the image. The goal is a warm, readable living room where buyers can see the sofa, wall, floor, and circulation clearly.
Make the Backdrop Work Harder for the Listing
The best answer to what to put behind a couch isn't always another object. A console or sofa table is the foundational choice because the category is defined as a narrow table placed against a wall or behind a sofa. Retailers also use names such as console table and entryway table, so agents can search across furniture categories when sourcing temporary staging pieces. Sofa tables date back to the late eighteenth century, and Thomas Sheraton discussed them in 1803, making the concept more than 220 years old according to this furniture history reference. That long familiarity helps explain why a narrow table, lamp, and restrained accessories often look immediately conventional to buyers.
For a behind-the-couch console, keep the height within 1 to 2 inches of the sofa back, use a depth of about 10 to 14 inches, and choose a width of at least 70% of the sofa, with 75% to 80% often producing a more stable composition, based on independent console-table sizing guidance. These dimensions protect the sofa zone from looking top-heavy or crowded. They also matter in open-plan rooms, where a narrow console can define the living area without consuming the negative space that makes the room feel spacious.
Staging has a direct role in buyer visualization. The National Association of REALTORS' 2025 survey reports that 83% of buyers' agents said staging made it easier for buyers to visualize the property as a future home, while the living room was the most commonly staged space at 91%, as summarized by this console-table staging guide. That makes the area behind the sofa a logical place to spend preparation time, but only when the addition improves the frame.
Use this decision sequence before the photographer arrives:
- Measure the composition: Record the couch width, wall width, sofa-back height, and ceiling height before ordering or moving anything.
- Protect circulation: Walk the intended path with the console, plants, or shelving in place. If the room feels tight, leave the area empty rather than forcing a decorative solution.
- Choose one dominant focal point: Let artwork, a mirror, a window, shelving, an accent wall, or a lighting fixture lead. Supporting objects should stay quiet.
- Remove competing clutter: Clear personal photographs, excess accessories, visible cords, crowded shelves, and furniture that interrupts the sofa's outline.
- Check reflections and glare: Stand where the camera will stand and inspect mirrors, glossy paint, glass, polished metal, and windows.
- Balance natural and artificial light: Open treatments when daylight helps, turn on only useful fixtures, and test for shadows across the wall and sofa.
- Review a test frame: A phone photo from the photographer's approximate position can reveal crowding, awkward height, or a distracting reflection before the final shoot.
Temporary, reversible choices make the most sense when speed matters. A console, textile refresh, movable plants, portable lamps, and artwork can improve the image without changing the property. Virtual previews are useful when an agent wants to test shelving, artwork, wall finishes, or lighting before recommending installation. Stage AI can help virtually test or restyle the scene, but the final image must remain consistent with the home's actual features and meet MLS expectations. Never use a virtual addition to suggest a permanent feature that doesn't exist without clear disclosure where required.
Photography deserves this level of care because it drives the first online impression. One survey reports that 74% of agents hire a professional photographer for every listing, and another reports that 72.2% of Realtors believe high-quality photography helps them win more listings, according to this real estate photography survey. Buyer behavior reinforces the point. One source reports that 85% of homebuyers consider photos the most critical factor when evaluating a property online, while another says buyers spend 60% of a listing-viewing session on images, compared with 20% on the description, as detailed in this photography statistics overview.
Vacant homes require an especially disciplined choice. 41% of top agents say vacant homes benefit most from staging, and 31% of agents prefer virtual staging for an empty home rather than traditional staging, according to this staging discussion. In those cases, the area behind a virtually added couch can receive a console, artwork, or lighting treatment that gives the room depth without filling the actual property with furniture.
Before adding anything, ask whether the sofa should be floated, centered, or left alone. A recent guide makes the useful contrarian point that putting nothing behind a couch can be perfectly appropriate when the room feels crowded, as discussed in these behind-the-couch ideas. For open-plan homes, entry-adjacent sofas, and rooms where the sofa back becomes the first visual boundary, multi-use pieces such as consoles, low bookcases, benches, and screens can define zones, but they still need sensible depth and walking clearance. This open-plan sofa-space guide is useful for considering the sofa-back area as a divider rather than decorative filler.
Finish the staging from the camera backward. Measure first, clear the path, establish one focal point, check every reflection, balance the light, and review a test frame. The most successful backdrop isn't the most elaborate one. It's the one that makes the room's purpose, proportions, and potential obvious within a clean MLS-ready image.
8 Behind-Couch Options Compared
| Item | Implementation Complexity 🔄 | Resource Requirements ⚡ | Expected Outcomes ⭐📊 | Ideal Use Cases 💡 | Key Advantages |
|---|---|---|---|---|---|
| Large-Scale Artwork or Mirror Installation | Medium, measuring, mounting, glare management | Low–Medium cost (purchase/rental; hanging hardware; possible pro installer) | High ⭐, fills vertical space, improves composition, amplifies light | High-end listings, large blank walls, showpiece seating areas | Strong focal point; versatile styles; visually expands space |
| Accent Wall Treatment (Paint/Wallpaper) | Medium, surface prep, paint or paper application | Low–Medium cost; time investment; removable options available | High ⭐, creates memorable backdrop and color contrast in photos | Quick transformations, rooms needing personality or color | Cost-effective, high visual impact, relatively fast change |
| Layered Window Treatments & Light Enhancement | Low–Medium, hanging at ceiling height; layering sheers/opaque panels | Low cost; rods, fabric; pro drapery install optional | High ⭐, controls light, adds vertical lines, enhances perceived height | Rooms with prominent windows; control for photography lighting | Softens light, adds elegance, frames architecture |
| Floating or Built-In Shelving Display | Medium–High, precise installation and styling needed | Medium–High cost for install; styling accessories required | High ⭐, adds depth, demonstrates storage and curated lifestyle | Spaces that benefit from shown storage or curated displays | Functional styling, layered depth, conveys organization |
| Decorative Plants & Living Wall Elements | Low, placement and basic maintenance; living walls add complexity | Low–Medium cost; ongoing care; occasional replacements | Medium–High ⭐, adds color, biophilic appeal; risk if plants look unhealthy | Eco-conscious buyers, softening architecture, casual/lived-in styling | High visual return for modest cost; introduces life and texture |
| Textured Throws, Pillows & Layered Soft Furnishings | Low, simple to arrange; styling expertise improves results | Low cost; highly interchangeable and reusable | High ⭐, boosts warmth, comfort, and magazine-style imagery | Any listing needing immediate livability and warmth | Extremely cost-effective, flexible, quick to update |
| Architectural Backdrop (Paneling/Wall Finishes) | High 🔄, construction, professional finish often required | High cost and time; may be permanent; contractor work likely | Very High ⭐, creates distinctive character and perceived value | Sellers investing in value-add or design-forward properties | Lasting architectural appeal; helps listings stand out |
| Statement Lighting & Ambient Design | Medium–High, fixture selection, placement, possible electrical work | Medium–High cost; electrician for hardwired fixtures; bulbs/dimmers | Very High ⭐, markedly improves photo quality and ambiance | High-end listings, rooms needing improved light control | Functional upgrade that enhances photos and mood |
Stage AI lets real estate professionals virtually add furniture and decor, restyle interiors, and test options for the space behind a couch before moving physical pieces or recommending permanent work. Visit Stage AI to preview listing-ready compositions and prepare a clearer, more persuasive living room image.